
In this guide, we’ll take you step-by-step through the process of preparing and uploading your very first avatar using Unity and the Somnium Unity SDK. It’s the second installment in our Creator Series, where we’re exploring how to bring custom avatars, wearables, and immersive experiences to life in Somnium Space.
If you haven’t yet set up Unity and the SDK, be sure to check out the first article: Somnium Space Creator Series: Step One – Installing Unity and the SDK
This series is built on Somnium Space’s official tutorial videos and documentation, so if you’re eager to jump ahead, those are excellent resources to explore right now.
What are 3D avatars?

In virtual worlds like Somnium Space, a 3D avatar is your digital self – your presence and persona in the metaverse. These avatars can be anything from lifelike human replicas to fantastical creatures, robots, or entirely abstract forms. They are fully 3D models that can walk, gesture, dance, speak, and interact with others in real-time. Whether you’re attending a concert, exploring a virtual world, or building immersive experiences, your avatar is the bridge between your physical identity and your virtual one.
3D avatars are more than just representations – they’re expressive tools. With facial expressions, hand tracking, full-body movement, and voice integration, they allow users to convey emotion and personality in a way that simple text or 2D images never could.
How Are Avatars Created?

Creating an avatar typically starts with 3D modeling software like Blender, Maya, or ZBrush. Artists sculpt and texture the shape of the avatar – this includes everything from the face and body to clothing, hair, and accessories. The result is a detailed mesh, a skin-like structure made up of vertices, edges, and faces that defines the avatar’s shape and look.
After modeling, textures and materials are added to give the avatar color, surface detail, and realism (or stylization, depending on the intended design). Some creators prefer to make avatars from scratch, while others use avatar creation platforms like Ready Player Me, which streamline the process. In fact Ready Player Me is integrated with Somnium Space, allowing you to create your very own avatar using the Workshop Client tool.
About Rigging

Once the visual part of the avatar is done, it needs to be brought to life. This is where rigging comes in.
Rigging is the process of creating a digital skeleton (known as a rig) that allows the avatar to move. Think of it like building bones inside a puppet: every bone corresponds to a body part – like the spine, arms, fingers, or facial muscles. When the rig is in place, the 3D mesh is bound to it in a process called skinning, so that when you move a bone, the mesh deforms accordingly.
For platforms like Somnium Space, avatars are typically humanoid-rigged, meaning they follow a standard human bone structure. This allows them to be animated through pre-made motions, full-body tracking (FBT), and real-time VR movement. A well-rigged avatar moves naturally and responds fluidly to user inputs, adding a layer of immersion and expression that’s essential in social VR.
Your Very Own Somnium Space Avatar
There are several ways to choose your personal avatar in Somnium Space. You can start with one of the default options, design your own through Ready Player Me, or buy a custom avatar from the integrated marketplace. But for those who want full creative control, this article will guide you through the most powerful option: creating and uploading your own avatar using Unity and the Somnium Unity SDK.
As we have seen, you can either create an avatar entirely from scratch in a tool like Blender, or find a free avatar you like and use that one. Creating from scratch is beyond the scope of this article, so we will focus on guiding you to some resources from where you can download avatars.
Using Mixamo Avatars
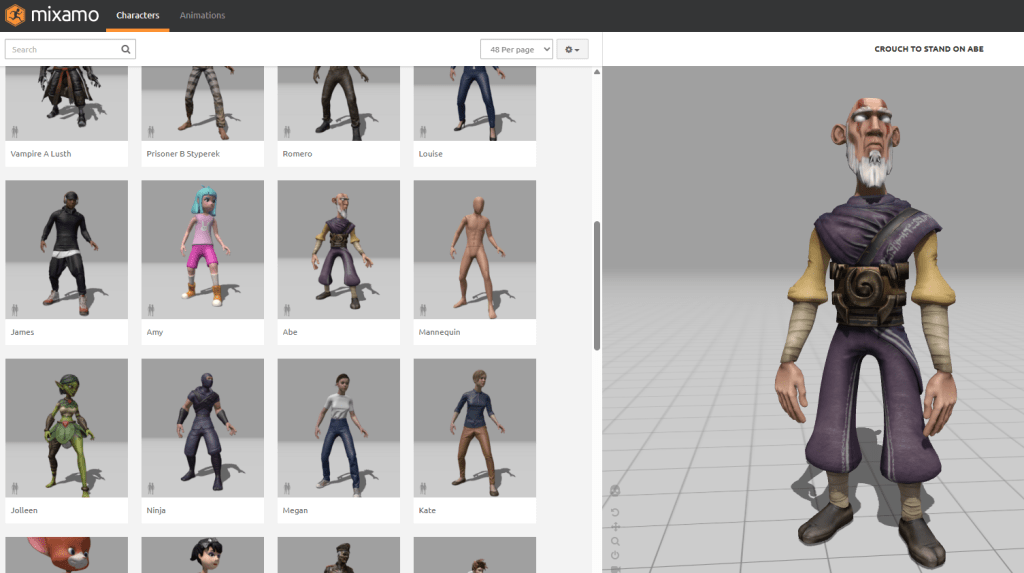
Mixamo has a very nice selection of downloadable avatars. Not only that, but the tool also allows you to upload avatars and perform auto-rigging. Mixamo’s pre-built avatars, however, are already fully rigged, so no need to go through the rigging process.

✅ Simply select the avatar of your liking and click Download. What you get is a so-called FBX file with embedded materials. For this tutorial we downloaded the following avatar:
✅ Right-click the folder in the Project pane in Unity to which you want to import the downloaded file and import it via Import New Asset.
Next you must extract the materials.
✅ Select the newly imported FBX file in the Project pane, click the Materials tab in the Inspector pane and select Use External Materials (legacy) for the Location.
✅ Click Apply.

✅ Next drop the FBX file onto where it says DROP YOUR MODEL HERE in the Hierarchy pane.
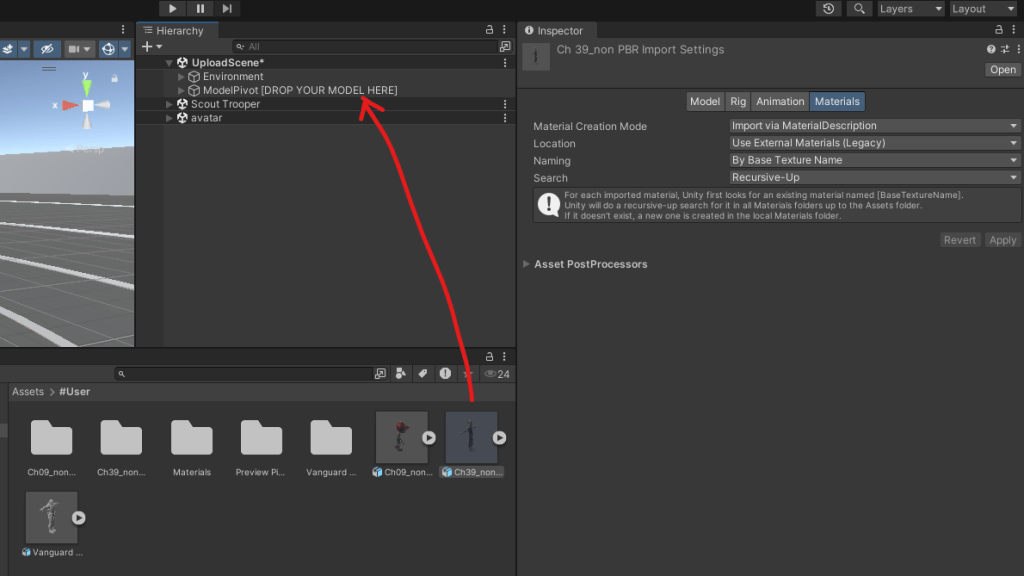
The Scene pane now shows your avatar, with all materials and textures applied.

In case multiple avatars are shown in your scene, you can toggle their visibility using the checkbox in the Inspector pane.
Jump to the section Setting Up the Avatar for Use Inside Somnium further down this document to finalize preparation.
Using an Avatar from VRCMODs
Another resource is vrcmods, which has a load of free avatars. The site is aimed at VRChat, but you can use the avatars for Somnium Space as well.
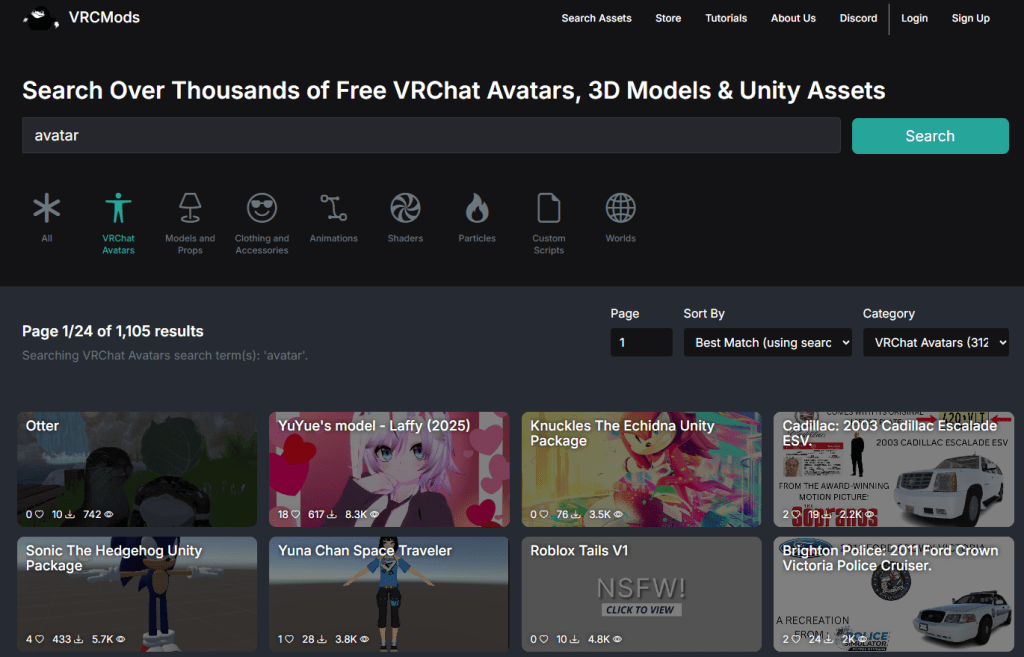
Avatars from vrcmod come typically as a Unity package, so you should be able to just double-click the downloaded file. It will automatically be imported into Unity.
For the purpose of this guide we will download the Scout Trooper avatar.
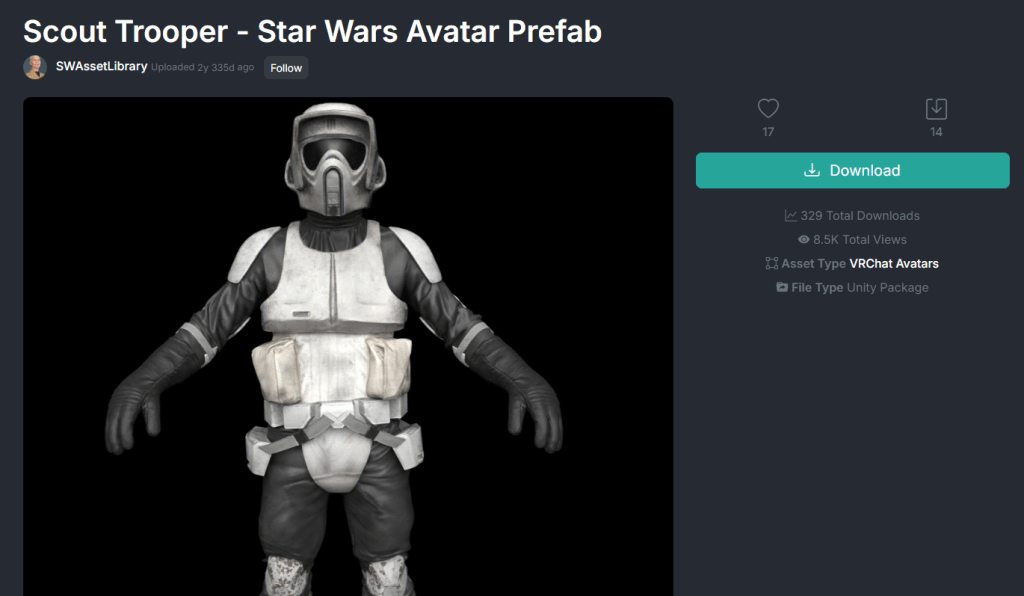
✅ Once downloaded, simply double click the downloaded file.
The Import Unity Dialog will appear. Now, there might be several files contained within the package that you would not need to import. Generally, import the textures, materials, .unity and .fbx files, etc.
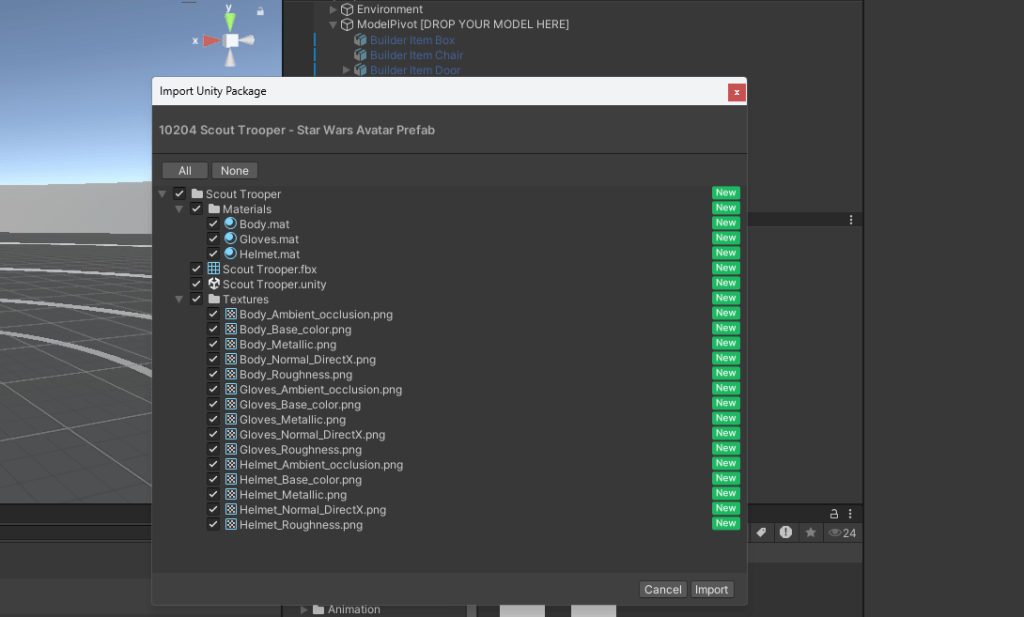
✅ Click Import. After import check the Project pane in Unity. In the screenshot below you’ll notice the folder ‘Scout Trooper’. I will drag and drop it to my Avatars folder, just to keep things a bit clean and tidy.

✅ Next drop the model onto where it says DROP YOUR MODEL HERE in the Hierarchy pane.
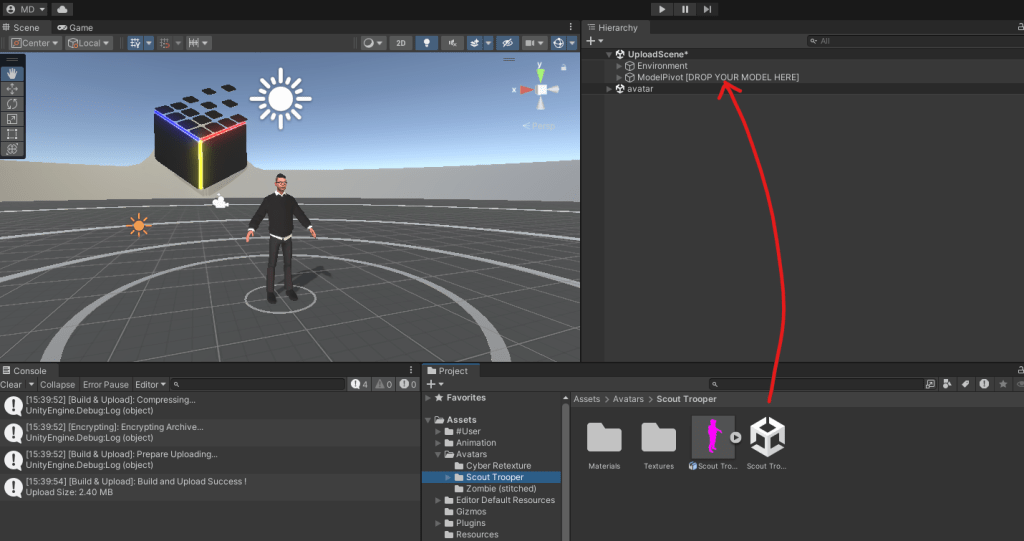
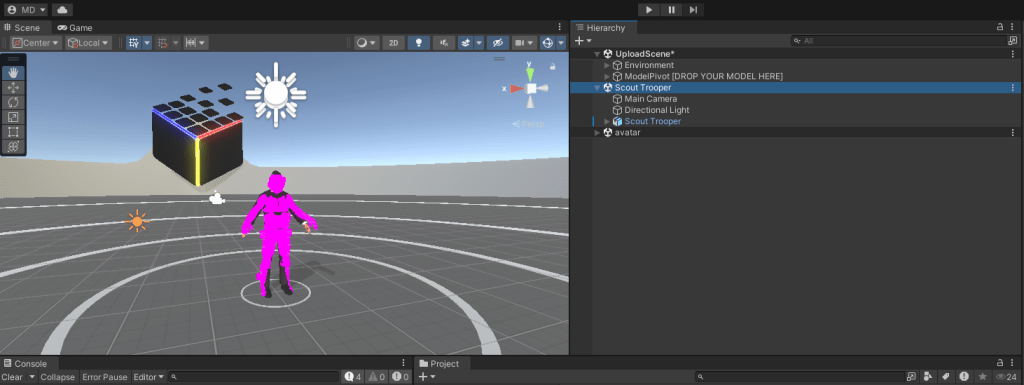
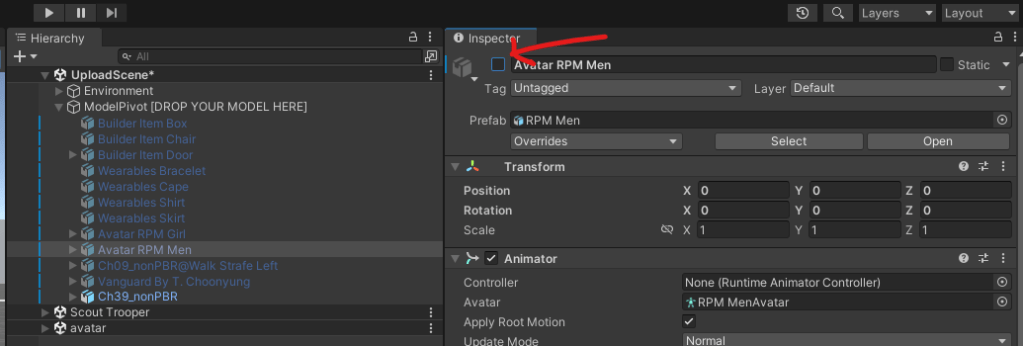
Our Avatar is now visible in the Scene pane. The default Somnium Space avatar is visible as well however.
✅ Select Avatar RMP Men in the Hierarchy pane and uncheck the box next to its name in the Inspector pane. Only our new avatar is visible now.

✅ Next select Body under our new avatar in the Hierarchy pane.
✅ In the Inspector pane, click on the drop down boxes next to the pink spheres. For each of them select Lit (Universal Render Pipeline) or Simple Lit (Universal Render Pipeline). This will allow us to put textures onto our model.

You’ll also notice our new avatar has turned white. Next we want to put the proper textures onto the materials for this avatar.
✅ Navigate to the Materials folder in the Project pane.

Quick tip: If you only see the folder structure in the Project pane, right-click the title of the pane (Project) and select Two Column Layout.

✅ Click on the first material (Body in this example).
✅ Click the little lock icon to it closes
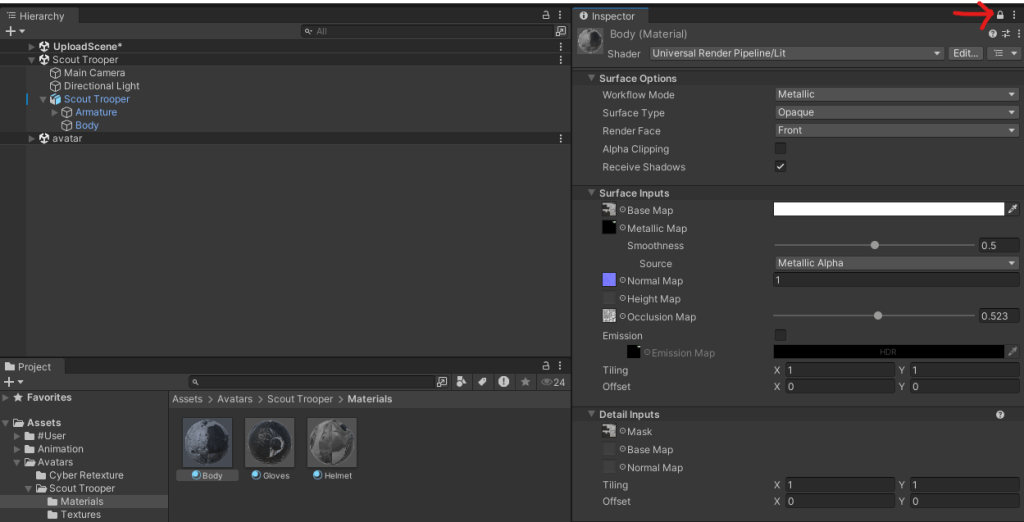
✅ Navigate to the Textures folder in the Project pane.
✅ Drag and drop the corresponding textures onto their respective slots. So base map texture onto the Base Map slot, metallic texture onto the Metallic Map slot, etc. You’ll notice the avatar receiving the textures and beginning to look like what it ‘says on the box top’.

✅ Repeat this process for any other materials as well. Remember to use the unlock/lock icon on the Inspector tab as you navigate between materials.
Setting Up the Avatar for Use Inside Somnium
✅ Select the avatar in the Hierarchy pane and click Add Component in the Inspector pane.

✅ Search for and select Avatar SDK Config. A blue viewport appears in the Scene pane.

A blue viewport appears in the Scene pane. Make sure it aligns with the avatar’s eyes.
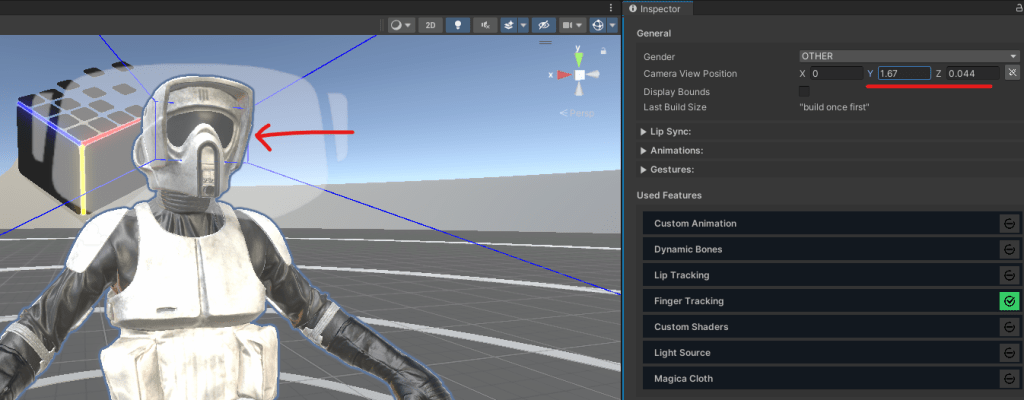
✅ Next, scroll down in the Inspector pane, select gender and enter a name and description for your avatar. Click Capture to take a picture (you can move your Unity camera in the Scene pane to create a good shot).
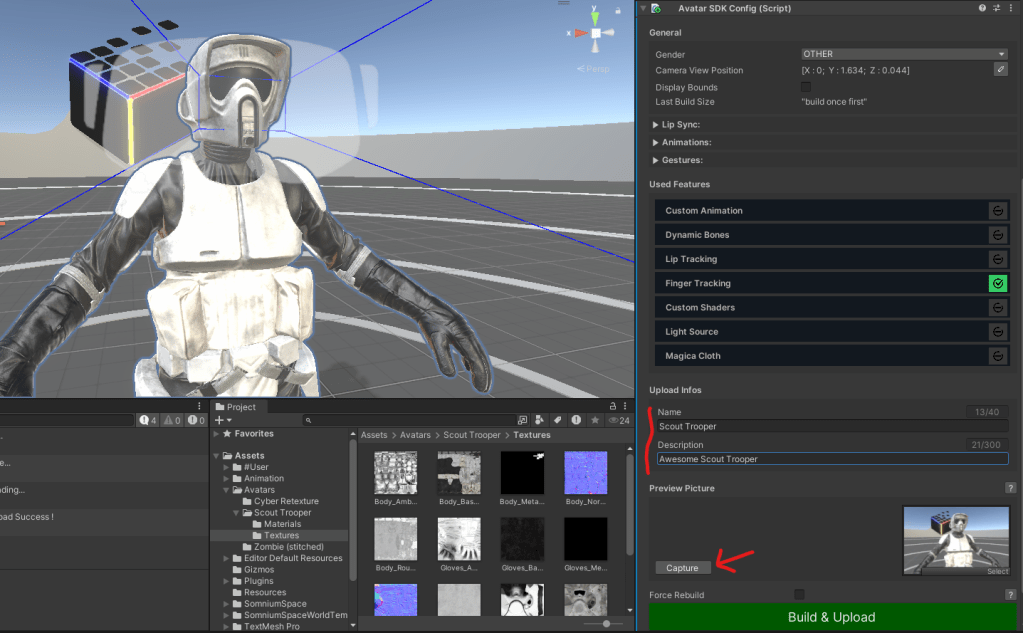
✅ Hit Build & Upload

✅ Click Build & Upload once again.
If all goes well, you’ll see this:

Checking Your Avatar in Somnium Space
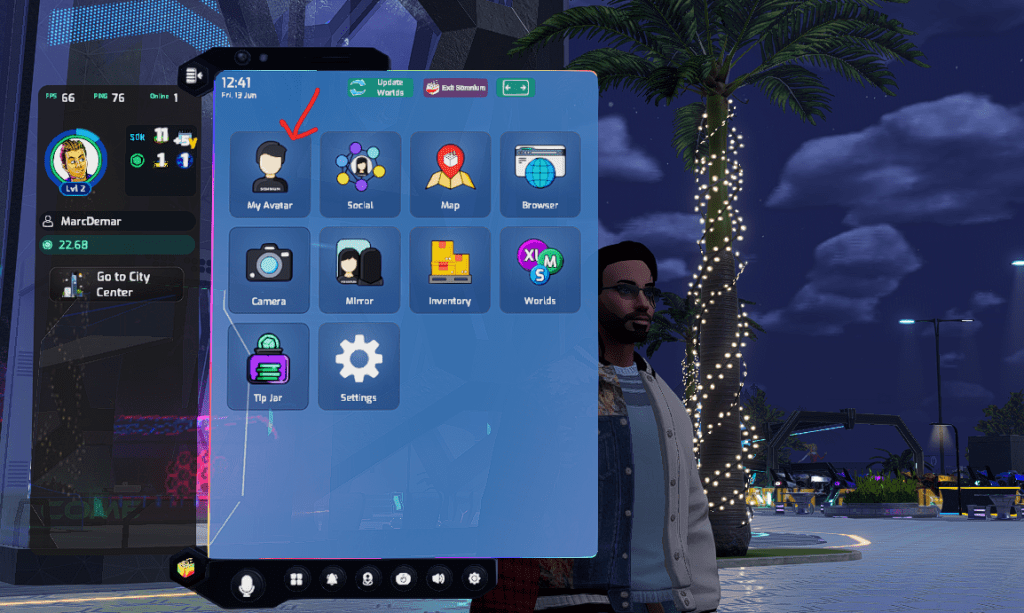
A quick way to check your uploaded avatar is by firing up the Desktop Non-VR Client, hitting the TAB-key to open the in-world tablet and selecting the My Avatar app.
Click Custom. You should find your newly uploaded avatar in the list. From here you can select it.
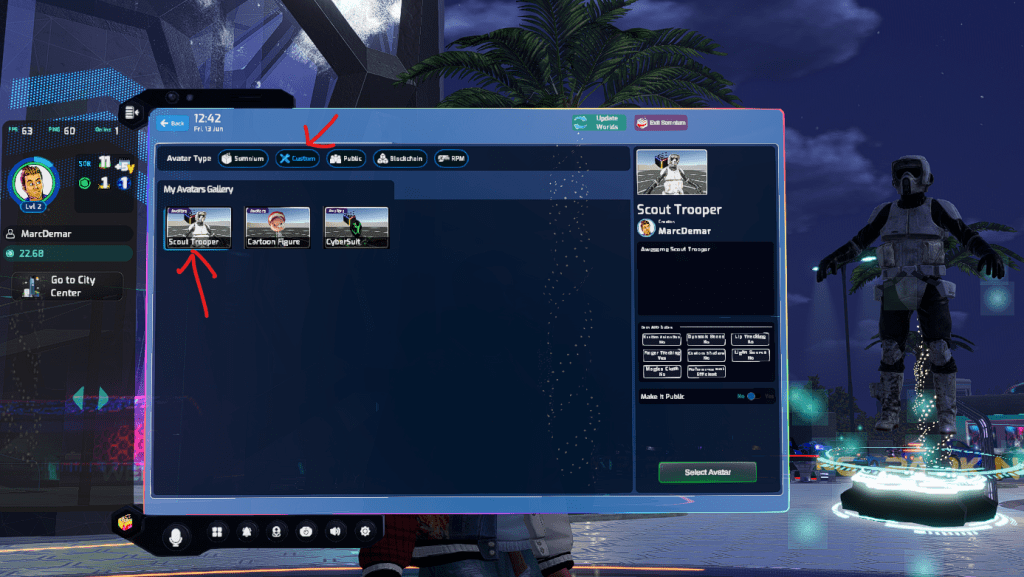
And voila! An amazing new avatar in Somnium!


About Somnium Space
Somnium Space, the company behind the VR1, also runs a blockchain-based virtual reality platform that allows users to create, experience, and monetize content and applications. The platform is committed to building a decentralized and immersive VR world that offers users a unique and engaging experience.
Discord: https://discord.gg/somniumspace
Authencity: https://authencity.io/user/somniumspace
Follow the Somnium Times
Authencity: https://authencity.io/user/SomniumTimes
YouTube: https://www.youtube.com/@SomniumTimes
Instagram: https://www.instagram.com/somniumtimes/
Leave a Reply