
It is surprisingly easy to create your own objects in Blender and make them available in the Builder, via Unity and the Somnium Space Unity SDK. This article describes the main flow. It is not an in-depth tutorial on how to install and use the various components. However, it may serve as a starting point, a high level overview, for those interested in learning more and getting started with creating their own custom Builder objects.
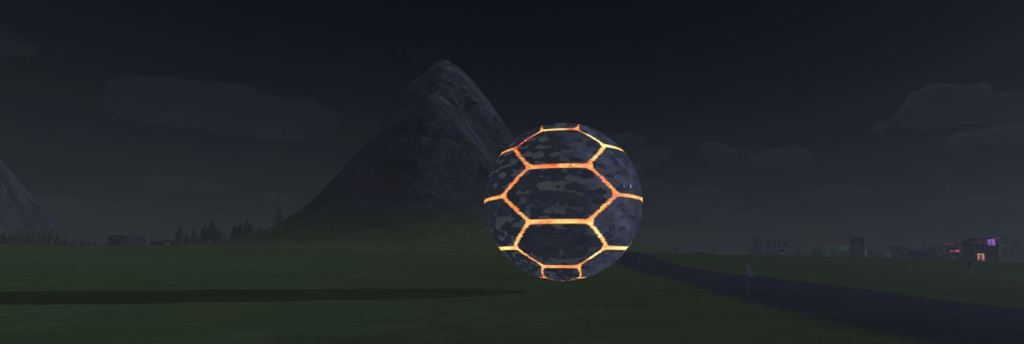
Using the simplest of objects in Blender, the open source 3D modeling tool, I managed to create the lava- or fireball you see below. It’s just a sphere, but its subsurface, pulsating fire glows in the Somnium nights, making it visible from afar. A simple object like this could be a cool element in any build.

Creating the object in Blender
Blender is a popular open source 3D modeling tool. While it takes practice to learn its rich feature set and model advanced scenes and objects, creating simpler structures isn’t all that hard. The sphere for the fireball, for example, comes out of the box. After some resizing and smoothing, I was done and exported the model to an FBX file.
There are many beginner tutorials on YouTube in case you’re new to Blender and want to learn the tool. Obviously, it’s not the only modeling software that is available. But after some fiddling around with it and watching a few tutorials on YouTube I found it pretty easy to use.
When modeling your object you need to be aware of a few constraints. Somnium Space only allows uploading objects that have a maximum of 15,000 polygons and 4-5 materials. There are various techniques to make sure you stay within these limits. While creating a smooth sphere can be really costly if you try to achieve this by increasing the number of polygons, using a lower polygon count with subsequent smoothing will create a similar result.
Preparing and uploading in Unity and Unity SDK

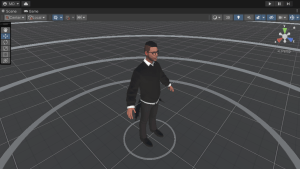
After exporting the model from Blender, the next step is to import it into Unity with the Somnium Space Unity SDK installed. The SDK is an add-on, which connects you to your Somnium account via a login. It contains an uploader scene and various settings to prepare your model before uploading it.
The Somnium Space Unity SDK manual, which can be downloaded from the website is very detailed and has a step by step explanation on how to install Unity and the SDK. While originally written to upload custom avatars, you use the same setup for uploading custom Builder objects.

Denevraut has a great series of tutorial videos that help you get started.
About Amplify Shader
To do some advanced object manipulation you can opt to purchace the Amplify Shader Editor from the Unity store. This add-on offers a visual interface to configure/program shader effects. It’s way beyond the scope of this article to go into much detail, but the fireball effect that you see below was created with an Amplify Shader in Unity. None of that was done in Blender (which only produced the sphere).
Export to Builder
Once your model is properly set up in Unity and all textures and shaders have been applied to the applicable materials, you are ready to upload the object to Somnium Space. Just press the green ‘Build & Upload’ button and the SDK will check your object for validity.

If there are no errors (e.g. you are not exceeding the maximum number of polygons), you can give your object a name and upload it to the Somnium Space server. Once this has been completed you are done and can now access the object from the Builder.

Builder credit system
One very important concept in the Somnium Space Builder is that of ‘credits’. Each object has a cost in terms of credits. Also, each parcel allows a maximum number of credits.
Suffice to say that you need to limit the number of credits for your custom objects. You can design the most elaborate chair, but if you are unaware of how to limit the credit count, they may be very costly (in terms of credit use). Below are some of the credit costs connected to the modeling of your object.
- 10 credits for an SDK build
- 5 credits for each individual object
- 5 credits for each material
- 3 credits for the collider
- 10 credits for an animator
- 50 credits for a light
Conclusion
It is easy to create a simple custom object and upload that to the Somnium Space Builder. It becomes a bit trickier when working with more elaborate designs, limit the polygon and material counts and ensure that the cost in terms of credits is as low as possible. But this is nothing that cannot be learned in the process. Much of the effort is related to learning tools like Blender, Unity, applying textures and shaders, etc.
But there is a lot of satisfaction to go from idea, making a 3D model and seeing that model come to life in VR!

Nice I am going to learn blender and try to build in the future this was very helpful and I like the insight on the credits
Awesome! Glad you liked it. As said in the article, it is very rewarding to go from idea to being able to visit your creation in VR!